~~~~~~~~~~~

~~~~~~~~~~~


Monday, April 29, 2024

A Winter Garden Room Box

 Been so long since I blogged. Last everal years have been different haven't they. I have been chipping away at projects, determined not to start any new ones till I clear some space. Actually I can't as I have no room!! I moved mid way last year and have forfeited space in my home for some tremdous space out of town with a huge garden. Well established fruit trees, a giant fig tree, so many birds and a glint of the river way down the back. Totally worth it.

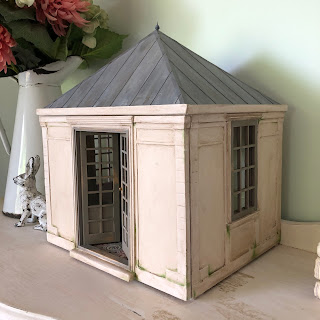
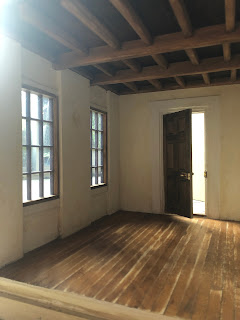
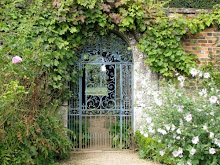
I did finish of a little project. A room box with a removable front. A garden room. Would love one myself in RL.


The light isnt very good. We've had another incredibly overcast and wet summer here again.

Take care everyone.
Carriexx


Thursday, March 10, 2022

Tosca.

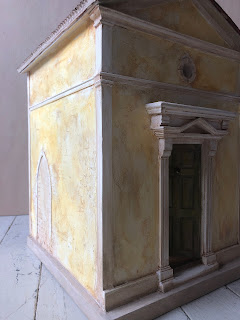
My scratch build project 'Tosca' is completed and available in my Etsy shop. Big sigh and a 'finally!'  A scratch build of my own design using gator board and ply. Finished with plaster, oil paints and sealed acrylic for the roof. A tutorial for how I did the roof can be found in the previous post. I didn't light this space but battery lights would work really well in here. I used two of my own here. 

It measures H 41.5cm x W 27cm x D 31.5cm.


 Ground floor H 21.8cm x W 23.2cm X D 27.5cm.


Roof space is H 13 cm x W 23.2cm x D 27.5cm.


Thank you for looking and I hope you are all well
Carrie xx


Saturday, July 10, 2021

Spanish/Mediterrean/All the Other Amazing Places Inspired Easy Dollhouse Roof Tile.

 It has been an age since I last posted!. Lots of changes, yeah life does that. Kids grow becoming self sufficient, most of the last two years spent dodging drought, fires, flooding and pandemics, travelling in the teeny moments that are 'safe' and Instagram is just easier. I post mostly there now. As well as having albums on my Lavande House Fb page.

The reason for this post is to show how I did the roof tiling on my recently finished Tuscan inspired project I called Tosca. More space to do it here than Ig. The choice of name purely because while I was intensly focused on sanding the walls of my new unnamed project my rather large Tosca print decided to dismount from the wall making so much noise on it's descent that I yelled and jumped and well it became Tosca after that. Anyhoos the tiling. This is just a way I did it, super easy and so cheap. I fully subscribe to easy and cheap projects!!!! There are actaully a variety of clay tile styles in RL but this is just one way I worked out.


Cardboard, the stuff from packing boxes not the cereal packet kind. I used two different boxes. A heavy duty double thickness packing box (Bunnings), this gives the stacked tile end look. I only used it here. A smaller box I already had for the tile strips. Not all corrugations are the same. The box I used for the tiling had more more corrugations per inch and I liked that look better for this project. 

From the heavy duty box I cut out two peices that would cover the roof. I didn't have them met up completely at the top, about a 5mm gap. At the time I had no idea what I was going to do there. I painted the ends in terracotta. Get right in the grooves as much as possible. Bit of raw umber dry brushing here and there.

You can see here the heavty duty cardboard and it's double thickness I used the exposed ends to get tha stacked tile look. It has a name and I can not remember it at all now. Glue it onto your project. There  was already ply roof pieces on my project and I glued the cardboard to that. 


To get to the corrugation you need to remove one of the paper sides from your cardboard. The best way to do this is to dampen it with a rather wet cloth. Once you can see the paper soak up the water you can start to peel it away as the glue starts to dissolve. I found running a skewer down each groove as I genlty pulled helped. Don't want to pull it too much or get it too wet. Try to take it off in as larger pieces as you can as you will use it for the capping tiles. To get the most of the remaining tags of paper off I ran a piece of folded sand paper down each one. I didn't get them all out and it doesn't show. Then paint it terracotta and when dry some random dry brushing with raw umber. You will more than you think!!


I cut my strips at 1 inch. I then painted one edge with the terracotta, this is the edge that you will be able to see when glued on. As you can see I then removed the backing paper from along just the one edge, the painted edge. The papered edge gives something for the glue to hold to and holds the corrugations together but the exposed edge acts to lock the strips together in alignment as it overlaps 


While standing a the side of my house I worked from the front of the house to the back when applying the strips. On the end of each strip cut it right to the bottom of a groove. Remove that paper tag for this and the next groove as these will be folded over the end when you start each row. 


Glued my first strip sitting right on the bottom edge of the roof with the with the two free grooves sticking out from the end. I waited till the glue had dried before getting the ends tucked in.


I used the pointy end of a skewer and ran it down the between the cardboard glued to the house and the house itself. This made a little space and this is where the end of each roof strip is stuck into with a little bit of glue. Again using the pionty end of a skewer to help it in. Or my nail. Do the same for the other end. Trim off at the bottom of the groove. Remove the backing paper and tuck in the ends, etc.


I ran a line of glue across the exposed ridges and then a line one the roof, overlocking each piece about  5mm. Repeat till done!!


For the top I cut a length of 9mm balsa dowel to fit the groove at the top with just a teeny little bit extra, glue it in. Taped off an area so that the gap between the dowel and the roof tiles can be filled with spak.


                                     I mushed spak into the ends and used a skewer to shape it a bit.


For capping tiles I painted the paper I had taken off earlier. I use the same paper as the colour will match up and this paper is quite tough when it gets damp. Paint it up the same as the tiling. I cut 14mm strips cut into 25mm lengths. For the two end pieces I glued two together just to give it a bit more body and to make it look more to scale. 

For the bottom roof edges I tapped it off so that I would'nt get any spak on my tiles. Make sure my tape isn't too sticky by sticking it onto my clothing or something first. Hate it when it takes my paint off. I then just pushed the spak into the groves. I could've done this before the tiling but I had run out of spak. Let it dry and apply more when needed as it shrinks. Remove the tape. I then painted the spak edge and roof capping area with a dirty paint wash to take away all that whiteness. Sealed it all with matte varnish to protect it. 


That's it! Gee I hope this is all understandable. I love this roof look and was something I had been working on for a while when I had a lightbulb moment one night. I hope this helps and I love to share it!! 

What I used:
Heavy duty packing box (Bunnings) - roof base.
Box - tiling strips.
Paint - Kaisercraft terracota, Chromocryl raw umber.
Blue tape.
Box cutter.
Scissors.
Soudal glue.
UniPro filler.


Take care!
Carriexx


Sunday, September 23, 2018

A White Orchid

 I have wanted to do an all white Greenleaf Orchid for a long time. I think the style of the house and the architectural details will look lovely all white. But sadly the fancy trim pieces in my kit have been cut from the absolutely worst pieces of timber of any of the Greenleaf kits I have done so far. It is like Weetbix, on a very bad day. Most just fell apart when I so carefully removed them from the sheet. Others just fell apart in my hands. The few left couldn't even be sanded. Of course the floors and walls were cut out of the strongest pieces of timber!! Of course!! So the outside is still a work in progress while I figure out what to do. But it has been so long since I made a post I thought I would show what I have done so far.


You would think just painting everything white would be easy. A big HA!! Well it was, once I let go of wanting to add colour. It was so much harder than I thought it would be!!! I put my paints and wallpapers away to reduce temptation. I love colour so much it was really hard for a long time to 'let it go' (everyone in my house will break out into song at the mention of those three words). I used spak first and then gesso in places that needed a bit more coverage. I then finished the whole house with white paint. I use RL house paint where I can. It covers so well and a little goes such a long way. Wont chip off. Any spill from my artist acrylics will just easily wipe off. I use British Paint white sample pot and it was about $9AU.


I added architectural features and detail to add some interest. With the floors I toyed with the idea of white but went with a wash of the lightest grey which I sanded back once it was dry to let the wood colour through.

I used LED lighting for this house. I have used them in the past for smaller 1/144 projects but never on this scale. I always have a stash of electric lights to use and usually go that route. I am so used to using electric lights and installing those that it also took a while to get my head around using LED. They are very easy to use and you get to be creative with making your own light fixtures. I had to lengthen all the wires for starters as I get them in shorter lengths. A lot of twisting wires together and heat shrink tubing was used. If your exposed wires touch each other then they wont work. I like to play it safe. I also need to get myself a better wire stripper. I've always just used my finger nails in the past but it got a bit painful after a while. I use Nano lights. They are teeny and so much easier to wire into jewelry findings etc that I use for light fixtures. They still give enough light I think. I dont like my lights to be too strong. I get the cool white and purchase the orange and red for the fireplace. The warm white can be a bit yellowing sometimes. The light fixture in the kitchen is a pendant. I threaded the Nano inside then used a spacer and the white plastic tubing from a cotton bud and then another spacer. Drilling a hole in the timber for the wire made some of it split and come away so I hid that using white paper circle punched out with a 9mm punch to act like a ceiling rose. Then painted it all white.


For the fire place I used flicker Nano in orange and red. I lightly twisted them together rather than gluing them. I arranged some sticks from my garden and glue them over the Nano lights. I pushed some red glass beads into the glue while it is setting. For the fire grate I bent the ends of a long brass finding at right angles and glued it onto a piece of black card. The pile of sticks fits tightly inside it. Then I just slid it all into the fire place with the wires disappearing down the hole I had made at the back. The light fixture I made using a large light pink pandora bead and a cone brass finding. Some fabric roses, more plastic tubing and a large bead cap for the ceiling rose.


 Here I used some pieces from a sandalwood fan for the dormer trim. Laser cut trim I used for the shelf over the bed and RL picture frame molding at each and of the bed space. It helps to hold the mattress in place but allows space for me to add bedding. The little wardrobe needs hardware still. To make it I used scraps of large balsa to make a box. Cut strips of 1mm balsa and glued them to the outside. For the front a strip on each side and narrower ones along the top and bottom. Strips for the door but there would be some space around. Before I glued them down I went around with a black Sharpie so that when the strips are down it would look as though there is space inside the wardrobe. Some cornice trim along the top. For the light I used flower style bead cap, pink pandora bead and a 1/12 scale juice glass. I left the twisted wires to show but painted them white.


Another cone finding and an old bead all painted white for this light fitting. I left the twisted wires exposed and they got a white paint treatment as well.


I love the way the light fitting in the bathroom came out. A bent brass stamping, blue glass bead and a large bead cap. I ran the wires up the wall and painted over them white. I was working on a way to hide the wire till I looked up in my own work room. My house was built before power and made from timber so no wall cavities to hide wiring. So when lights etc were finally added during the 50's all the wiring was run along skirting boards, cornice and up the walls etc and just painted over. I did the same here. One of those 'oh why didn't I think of that before and save myself so much headache' moments. 


I am currently working on the outside. Wrestling and trying to find ways to salvage any of the fancy trim. Lots of carefully gluing and clamping pieces together so far and have gotten the three gable trim pieces together. Thinking the exterior will have a very worn and slightly derelict look to it!! 

Thanking you stopping by and take care!!

Carriexx