~~~~~~~~~~~

~~~~~~~~~~~


Tuesday, March 13, 2012

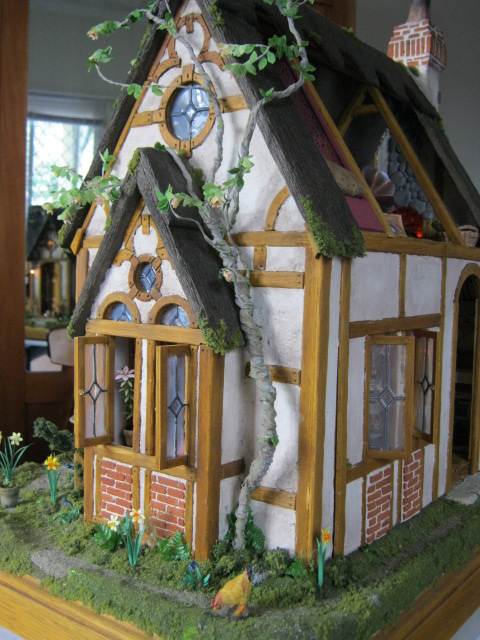
Warm Thatcham Nearing Completion.


This photo is showing the back removable wall in place. There is a roof panel as well that is held in  place with magnets.

Photos are a bit all over the place sorry. Blogger keeps changing and I haven't been blogging enough to keep up with the changes!! I'll add more external photos later. But now that both my boys are at school I have been revelling in all that time to myself!!! So I pulled my litte house out of the corner and got to work. The kitchen and upstairs area have remained mostly unchanged. The garden now has it's daffodils, bluebells and cyclamen. The lounge area more cluttered. Now if I could just shrink myself and all who wish to visit.

Sunday, February 12, 2012

Water Everywhere!!!

I haven't had too much time for minis. My Etsy shop has kept me very busy and my youngest has been home from school for over a week now with a nasty cold. The weather here gets pretty crazy at this time of the year is well. As you can see by the photo below. It's not called the wet season for nothing. Torrential tropical rain!!! This is what happens when we get a downpour. Sometimes my street can flood up to four times a day! It was just a little one when I took this picture last week. That's my bin you can see lying down on the lawn. It was further up the street and it had  floated down. I have a very nice neighbour and he has brought my wandering bin back for me many times.


The picture below is looking outside my bedroom window. There is a street under all that water. The thing is it is still very very hot and humid. This was taken at 5am and it was already hot. So I stay inside all summer and do minis!!! It's the dry season we get out and play!!! That's Autumn,Winter and Spring. Eight months of beautiful weather!!!!


So back into my cool house to do more minis!!!! I'll pop my head out the door occasionally to see if the street has gone under again and check that my bin is still in it's moorings. Hoo roo!!!!

Wednesday, February 1, 2012

A Start for Maison de Livre

What a start to the new year!! Crazy as usual. I hope it means it is all getting itself out of the way now and the rest of the year is quiet. My computer crashed twice, under my house flooded ( the Esky was the first floatation device to find its way out into the street), lost the Internet soooo many times, my roof leaked in my mini room so all furniture moved out and sooo many other things happened that I need a holiday to have a rest from the holidays!  And Blogger has all changed, argh. It doesn't like long posts it seems and wants page break. ??? Hellloooo says 2012!!
Deep breath in and out. I started this Parisian inspired townhouse with book shop on the bottom floor for my niece nearly a year ago. I've lost a year!!!! The main problem was as always I had too many ideas. I couldn't decide. Soooo many ways to do a Parisian townhouse with a book shop on the ground floor. Then life came in as it does and filled in the little areas of quiet bits I had left and Maison de Livre (book house) got pushed to the scary grey area and never seen again. Up against a wall behind Greenleaf kits that is. Then the wonderful Christine Lea Frisoni started up her blog and the wonderful ease in which she does her beautiful homes helped clear up my messy head. I knew I didn't have the room for stairs and was trying desperately to get my head around that. I knew I had to give the illusion of there being more to this tall house as it was a skinny bookcase in a former life. Not a whole lot of room, just a lot of rooms. With my inspiration freshly awakened from it's coma I got stuck into it. So after nearly 12 months of face pulling I did the kitchen in a week. Insane isn't it. I like to tell myself that I used that time to collect all the bits n pieces I needed for it. That's my excuse and I'm sticking to it. I started with the entrance. A room 5cm x 12cm wasn't too much to take on and easy to rip out and start again if it was awful. I used heavy cardboard for just about everything. Bristol board is relatively unheard of in the Land Downunder. Gesso, my best friend, on everything. Use it as a spak when need to. Comes of my clothes very easily. The range is a cheaper one made over to look more Frenchified. I drilled a hole in the back and have put in a flame flicker globe. It comes with a flue but I didn't want to use that so I glued a finding over the hole so the fire light will flicker through. I painted over all of it with a matt black to give the look of cast iron and change the handle and knobs to ones more in scale. Everything else is made from balsa. I love balsa because it's soft and easy to work with. I hate balsa because it's soft and hard to work with.

The tiles I made myself. It is something I thought of quite some time ago and it was great to finally give it a go. They came out way better than I expected. I have some tiles coming and I will be doing some more to put in my Etsy shop. They are easy to put in and give a great look.There are also sooo many designs out there. I have found some wonderful Art Nouveau ones for the bathroom. Rebekah had a look at her kitchen over the weekend and I took the squeals of delight coming from my mini room as a good sign.

Sunday, December 25, 2011

Merry Christmas from Down Under

Merry Christmas everyone from Australia!! Today for us is of the beach, seafood, bbq and family all around!! It's a crazy busy time of the year. Christmas then New Years and fireworks. Then getting my boys back to a new year of school!! Life I'm sure will slow down yet again to a little less busy and minis will take up my days. A big thank you as well to all my new followers.
Until then keep safe everyone and I'll see you in the new year!!!!

Friday, November 18, 2011

Little House Nearly Completed.

I haven't had much time to work on my little house. This time of year is mad! But I took a few pictures and thought I would post them. I had a go at making a basket. It's a scruffy one but so is my RL one. My little house is slowly filling up. Just need to work on the garden and outside area and it's nearly done. Don't look at the blue tack holding the rolling pin in place will you. Every time I needed to move the house (it's on an old computer desk of the kids, it has castor's) there would be this horrible noise of all the little things carefully arranged falling. At one stage the kitchen looked like it had been ransacked!! Double sided tape in tiny pieces and blue tack fixed that. The table set with goodies for a yummy afternoon tea. The tea cosy was an Ebay find. The bullion roses are so small and the colours are delicious. Some of Jennifer's mail from Looking glass Miniatures on the sideboard. The letter holder is just a brass finding bent to shape. I had smashed the hurricane lamp part of this light. A pandora bead fits over the top nicely and gives a lovely glow when it is on. I will never recover a wing chair again. EVER!! It was awful to do and I don't like the messyness but the print is now more to scale. I used double sided tape to make the cushions and they are stuffed with glass beads to make them floppy. This is looking through the bay window. The sideboard still needs to be filled with 'stuff'. Plans for the next house are all sketched out and supplies are en route!! How excitement!!!

Thursday, November 10, 2011

Linen, Lace and Corsets.

I finally finished the bed. I gave up trying to figure out what I wanted and just went with what I had. I really don't like sewing so everything is held together with strips of double sided tape. I used hemming tape for the laces. The pillows are stuffed with loo paper. I found I could get them to squish a bit better that way. I didn't want fluffy pillows. The reason I become so spurred onto to finish the bed was so that I could show of the beautiful corsets from Marlie. I have become a huge fan. Her work is amazingly neat and so fine!! Bows so tiny and porcelain flowers!!! The matching briefs were a wonderful surprise!!


Click to find Marlies Etsy shop.

How to do slippers evaded me for such a long time. Came to me very quickly one afternoon and I was left wondering why I was having so much trouble in the first place. Over thinking the culprit yet again. Does it every time. Cut a sole shape out of some pretty paper. I reduced samples of wallpaper in Photoshop and printed them out. A small square of lace glued to the underside of the toe area. About an inch, a small inch did it. When it has dried bring the lace up and over. Before this gets glued look to see where you can trim away lace to reduce bulk. Glue underneath again to form the upper sole area. I used felt as the bottom sole. It hides my really poor attempts as cutting a neat curve. Teeny bows on top. I went a bit nuts and made a heap of them.


A few more things to add. Cluttering stuff really. An antiqued stool for a bedside table is up to it's fourth layer of colouring for maximum chippy, scuffed oldness. Thatcham is nearly finished and I am already planning my next project!!

Monday, October 17, 2011

Postcards, Mail and Paper Dolls.


We had a wonderfully tropical stormy weekend so I sat in my little sunroom and wondered what I could do with paper dolls. I love them!! Had them as a kid, Barbie of course. On a school trip to Sydney years ago I came across one of those arcades full of odd shops and one was selling vintage books, etc. Inside there was a whole display of vintage paper dolls. Well they left Barbie for dead!!! The one of Hollywood's Golden Era greats were the most amazing. Ava Gardner and Vivien Leigh from Gone with the Wind where among my favourites. So I Googled once again and found many different types that were published within magazines. I put them all together and made a scruffy little box to store them in. French label on the box because there are so many of them on the net!!


Here are some mail that I promised a little while back. The postcards you cut out and just fold in half. The envelopes have been left with a lot of space around to allow you to cut the back part that you fold over. Before I cut them all out I give them a dirty wash with raw umber paint to add the age effect. The print sealed first or it all runs! The photo of the 'rocket' envelope below is how to cut them out. I use a glue stick, love them. Pinched from my eldest desk. :0)


I'm off now to make another scruffy box for my mail. I have more lovely french labels and another storm is on it's way!