
It has been an age since I last posted!. Lots of changes, yeah life does that. Kids grow becoming self sufficient, most of the last two years spent dodging drought, fires, flooding and pandemics, travelling in the teeny moments that are 'safe' and Instagram is just easier. I post mostly there now. As well as having albums on my Lavande House Fb page.
The reason for this post is to show how I did the roof tiling on my recently finished Tuscan inspired project I called Tosca. More space to do it here than Ig. The choice of name purely because while I was intensly focused on sanding the walls of my new unnamed project my rather large Tosca print decided to dismount from the wall making so much noise on it's descent that I yelled and jumped and well it became Tosca after that. Anyhoos the tiling. This is just a way I did it, super easy and so cheap. I fully subscribe to easy and cheap projects!!!! There are actaully a variety of clay tile styles in RL but this is just one way I worked out.


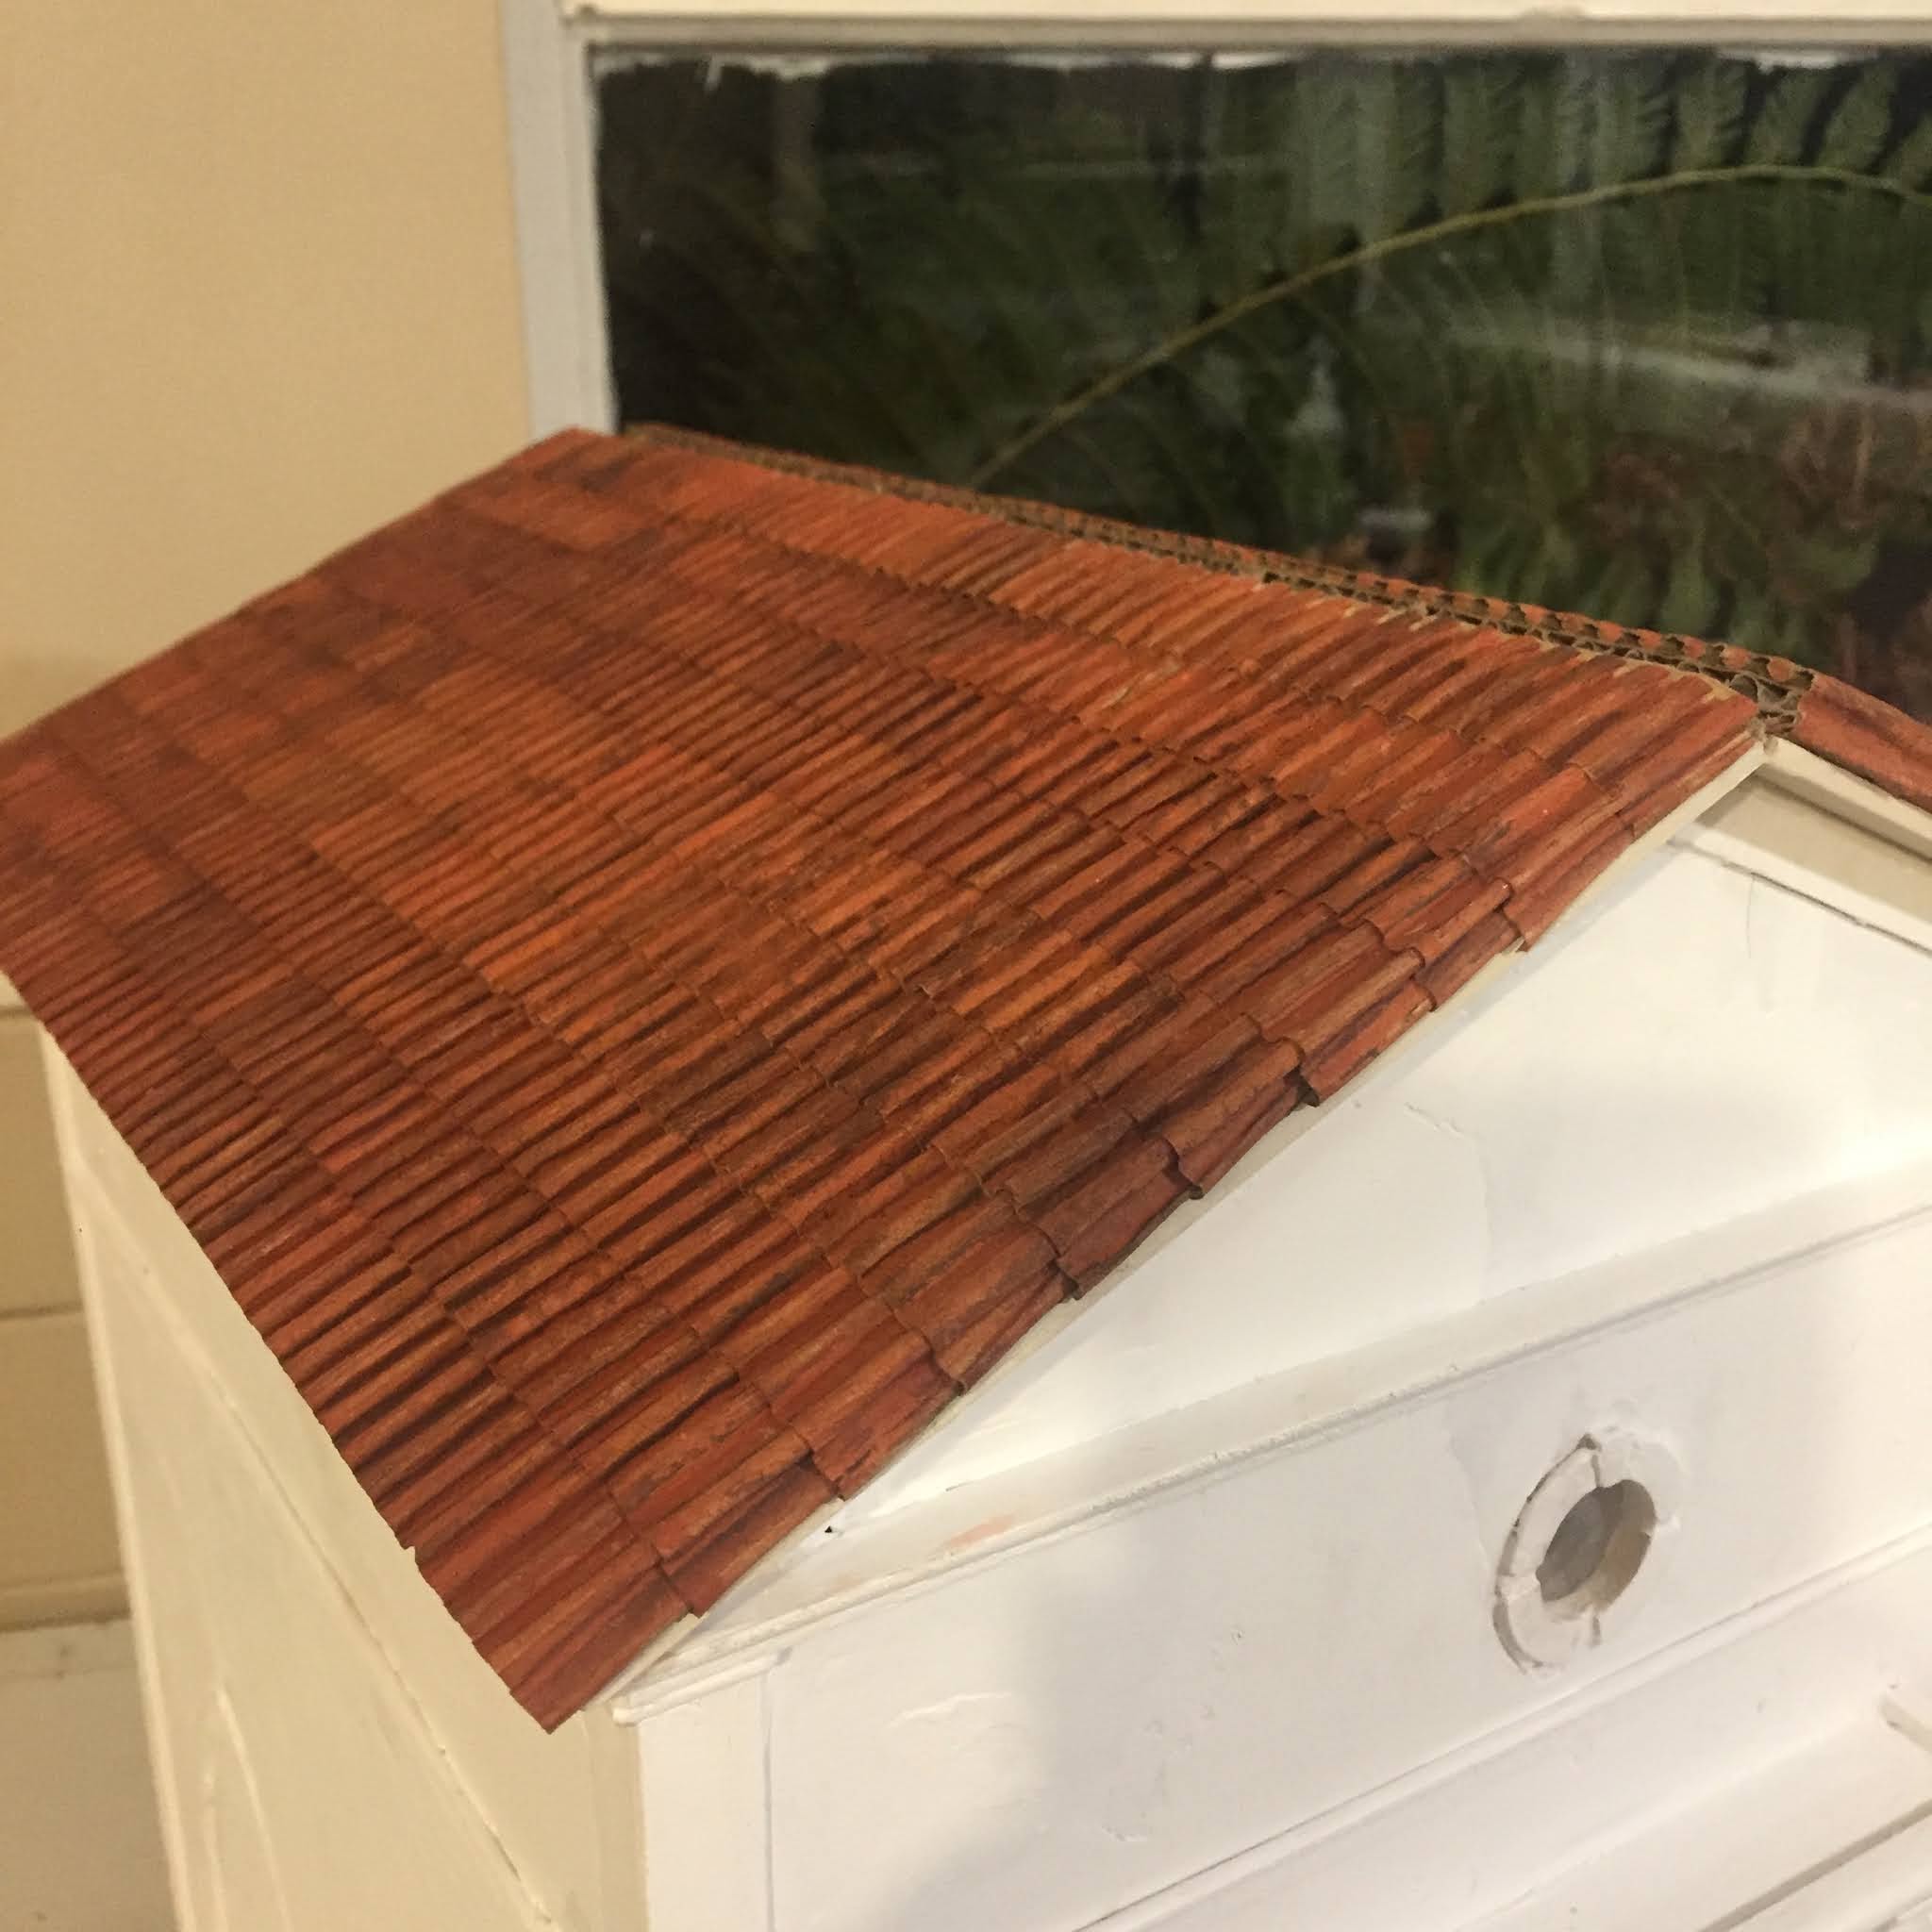
From the heavy duty box I cut out two peices that would cover the roof. I didn't have them met up completely at the top, about a 5mm gap. At the time I had no idea what I was going to do there. I painted the ends in terracotta. Get right in the grooves as much as possible. Bit of raw umber dry brushing here and there.
You can see here the heavty duty cardboard and it's double thickness I used the exposed ends to get tha stacked tile look. It has a name and I can not remember it at all now. Glue it onto your project. There was already ply roof pieces on my project and I glued the cardboard to that.


While standing a the side of my house I worked from the front of the house to the back when applying the strips. On the end of each strip cut it right to the bottom of a groove. Remove that paper tag for this and the next groove as these will be folded over the end when you start each row.


I ran a line of glue across the exposed ridges and then a line one the roof, overlocking each piece about 5mm. Repeat till done!!


For capping tiles I painted the paper I had taken off earlier. I use the same paper as the colour will match up and this paper is quite tough when it gets damp. Paint it up the same as the tiling. I cut 14mm strips cut into 25mm lengths. For the two end pieces I glued two together just to give it a bit more body and to make it look more to scale.

For the bottom roof edges I tapped it off so that I would'nt get any spak on my tiles. Make sure my tape isn't too sticky by sticking it onto my clothing or something first. Hate it when it takes my paint off. I then just pushed the spak into the groves. I could've done this before the tiling but I had run out of spak. Let it dry and apply more when needed as it shrinks. Remove the tape. I then painted the spak edge and roof capping area with a dirty paint wash to take away all that whiteness. Sealed it all with matte varnish to protect it.


.jpg)


Thank you so much for this, Carrie as I have one of my many unfinished projects that will require exactly this type of roof. I am so glad you posted it to your blog as I, like many, many others I know, do not use instagram. I am also one of those who don't use twitter or facebook or other such social media platforms so I guess I will just be left behind one of these days but, I'm okay with that if the only other choice is to sign up for the other platforms. Hopefully I still have many years left where I can follow my friends through their blogs about their wonderful creations. - Marilyn D.
ReplyDeleteUn gran tutorial , gracias, buen fin de semana
ReplyDeletebuen trabajo, gracias por el tutorial
ReplyDeleteUn buen tutorial.
ReplyDeleteYo también utilicé el cartón corrugado en el tejado de una cabaña y lo pinté de negro pizarra.
Un saludo
Great idea! The roof is amazing.
ReplyDeleteVery clever, and very neatly done! Thank you for sharing the process with us.
ReplyDeleteThis is a really good blog wish more people would read this , you offer some really good suggestions on Dirty Roof Bundaberg. Thanks for sharing.
ReplyDeleteSuper cute!!! Thank you for joining us at Love to idea, good luck!!!
ReplyDeletewordpress
blogspot
youtube
ហ្គេមបាញ់ត្រី
I love how creative and resourceful this project is.
ReplyDelete